Setting Koneksi Database
A while ago, I answered on this SO question about using 2 database connections.
In answering that, I did some investigation which I'll write up here.
Here is how to run more than one database connection. Metal slug 3d ps2 iso.
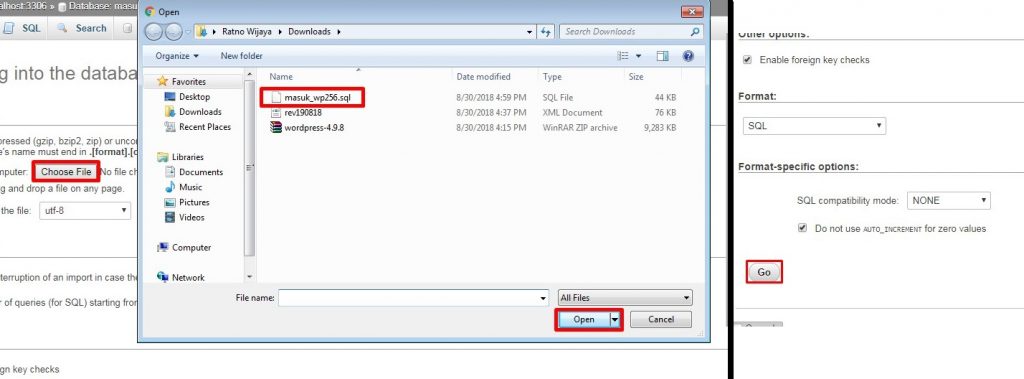
Kadang saat instalasi aplikasi SIMAK BMN 2013 di laptop yang belum pernah terinstal aplikasi SIMAK, sering terjadi permasalahan khususnya di koneksi database SIMAK BMN. Pertama, pastikan dulu untuk menginstall database SIMAK BMN 2010 karena instalasi database SIMAK BMN 2013 tidak menyertakan installer master MySQL dan connectornya. The primary means of defining a database connection is via the $databases array in settings.php. As its name suggests, $databases allows.
This article is about using databases with different data, not necessary for load balancing (or connection pooling) between databases.
Define Connections
Inside of your datbase configuration file - likely app/config/database.php - you can define more than one database connection of any type. In fact, you can define as many connections as you'd like. For instance, if your application has to pull data from 2 MySQL databases, you can define them both separately:
We have our default connection still set to mysql. This means that, unless we specify otherwise, the application will use thet mysql connection.
Specify Connection
Now that we have a 2nd database connection setup - how do we use it in code?
It turns out there's a few ways!
Schema
Within the Schema Builder, you can use the Schema facade with any connection. To specify which connection to use, simply run the connection() method:

Query
Similar to Schema Builder, you can define a connection on the Query Builder:
Eloquent
You can also define which connection to use in your Eloquent models as well!
One way is to set the $connection variable in your model:
You can also define the connection at runtime via the setConnection method.
Be careful about attempting to build relationships with tables across databases! It is possible to do, but it can come with some caveats and depends on what database and/or database settings you have.
- Intellij Idea Tutorial
- Intellij Idea Resources
- Selected Reading
IntelliJ provides database tool which allows you to perform database related operation from the IDE itself. It supports all major databases like MySQL, Oracle, Postgress, SQL server and many more. In this chapter, we will discuss how IntelliJ supports MySQL database.
We assume that the reader is familiar with the database concepts and the required databases’ tools are installed and configured on your system.
Create Database
To begin with, we will create a database - test_db. Execute the following command in the command prompt −
Connect to Database
Follow these steps to connect to a Database −
Navigate to View → Tool Windows → Database.
Click on the green plus icon and select Data Source → MySQL.
Enter the host address and click on the Test Connection button.
If everything goes well then it’ll show Successful as shown in above image.
Click on OK button to save connection.
Create table
Follow these steps to create a new table −
Right-click on the database pane and select schema.
Select the New → Table option
A new window will appear. Define the table with columns, types and so on.
Tupi animation software download. Click on the Execute button
Click on the Execute button
Insert Data
Follow these steps to insert data −
- Select table from the database pane.
- It will open table in the new window.
- Click on the plus icon to insert new row.
- Click on the Submit button to make the changes permanent.
Retrieve Data
To retrieve data, double-click on student_table from the database pane. It will show tabledata in new window.
To ensure that the data is inserted into the table, open the command prompt and executethe following commands −